With warming weather and perpetual sun, summer is the season of flavor-filled fruit, ripened under the rays and begging to be turned into the most American of after dinner indulgences: the pie.
As every experienced baker knows, a great pie begins with the crust. But, achieving the ideal pie crust can prove somewhat challenging without wheat.
Creating a gluten free pie crust requires a good recipe and a delicate touch. But, the flakey, fluffy results are well worth the effort. And, for a certain set of the American population, bothering to craft a crust without gluten, as opposed to its more malleable, all-purpose flour forebearer, is a necessity.
It’s no secret that Americans are no longer bound together by their love of grass-related grains. Celiacs, gluten intolerants, gluten sensitives, and fans of food trends alike are adopting the massively popular, alternative lifestyle. As a result, a significant number of people are cutting out foods, cosmetics, and any suspiciously sticky items that might contain the starchy protein.
As our contribution to the wheat-free cause, we’re providing step-by-step instructions for how to make the perfect gluten free pie crust. Because, everyone deserves to enjoy a big slice of homemade pie once in a while.
Since summer’s fruit fillings cry out for a crust, just like grandma’ used to make: classic, sweetened and significantly browned when baked. Follow the recipe below for a gluten free crust, tailored to the season’s bounty that’s sure to transport you back to childhood in one bite (without the gluten, of course).
For the full Betty Crocker-goes-celiac experience, follow the do-it-yourself recipe below. On days when you’re jonesing and need a quick fix, you can substitute the flour concoction for a store-bought, gluten free blend. But, make sure to check the label of ingredients, specifically for xanthan or guar gum. Adding this elasticity aid to an already gummed-up mixture will make an unpleasantly pliable dough.
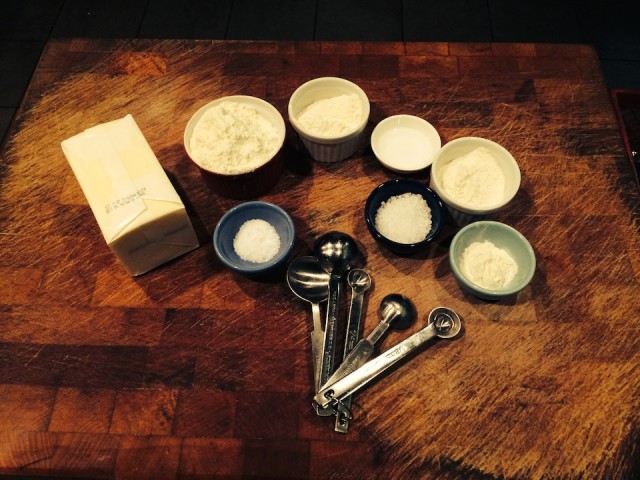
Ingredients:
Yield:
2 9 in. pie crusts
Recipe:
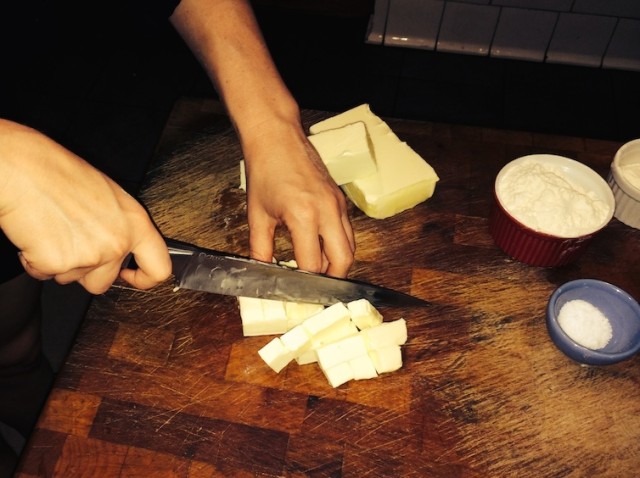
1. Cut the butter into small pieces and place in the freezer to chill, ensuring that your crust will be fluffy and flaky when baked.
2. Combine the dry ingredients. You can either combine the ingredients in a food processor by pulsing the mixture a handful of times. Or, you can whisk the ingredients together in a mixing bowl.
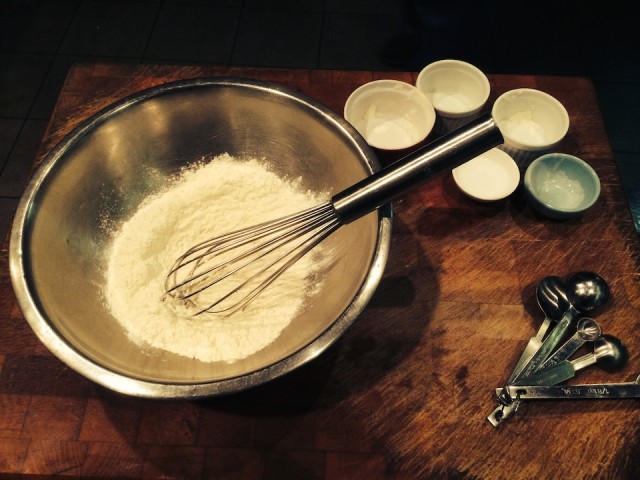
3. Add your chilled butter to the dry ingredients. Then, incorporate a teaspoon of water, one at a time, while mixing. If you are using a food processor, pulse the mixture until the butter is incorporated but visible pieces remain. If your flour is in a mixing bowl, stir in the ingredients using a wooden spoon.
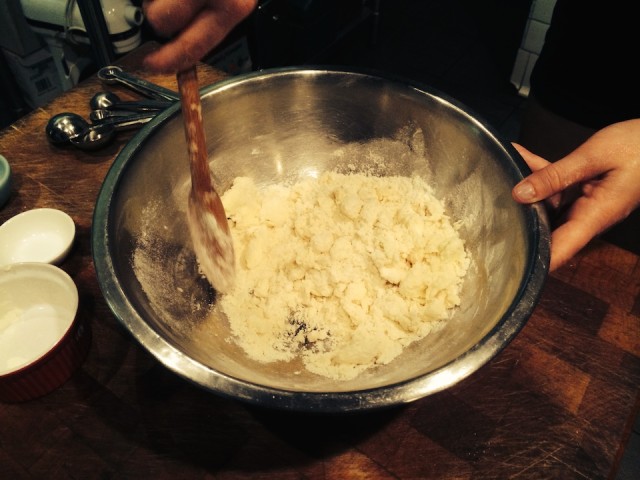
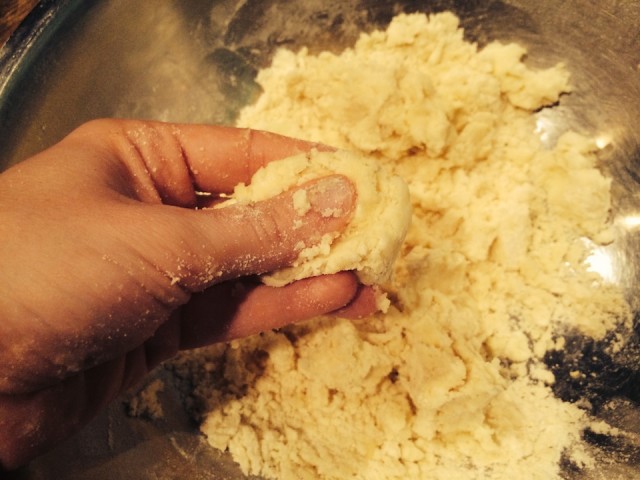
4. Test the consistency of the mixture by squeezing a piece of the dough. If the dough crumbles in your hand, the mixture is too dry and requires more water. Add in one teaspoon at a time, until the dough holds its shape.
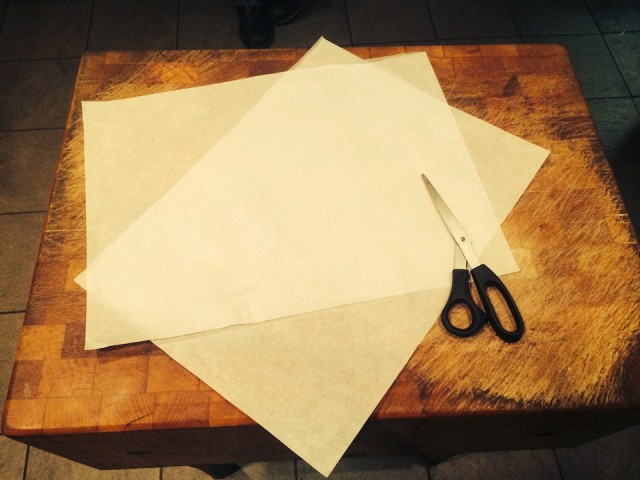
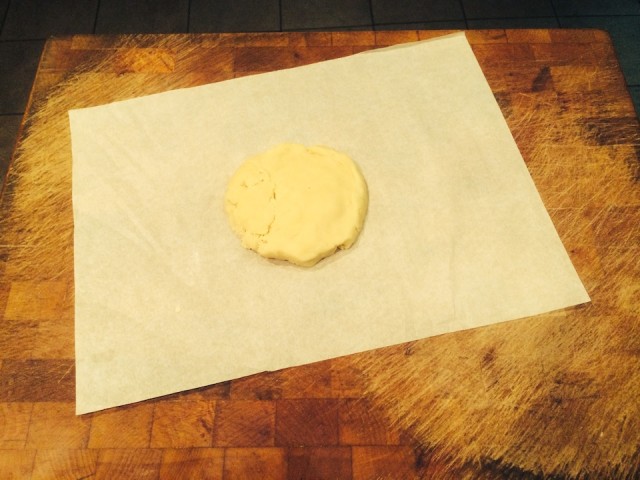
5. Remove the dough from the container, and divide it into 2 halves. Place the halves in separate gallon-sized, re-sealable bags. In the bags, form the dough into cylinders and place the bags in the refrigerator for at least 1 hour. While the dough is chilling, cut 2 pieces of parchment paper into 12 in. x 18 in. rectangles.
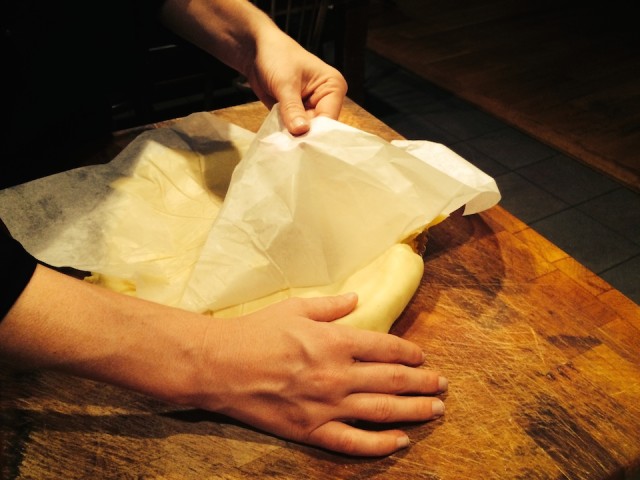
6. Remove one of the bags from the refrigerator and allow the dough to sit until it reaches room temperature. Place one of the pieces of parchment on the counter and center the dough on top.
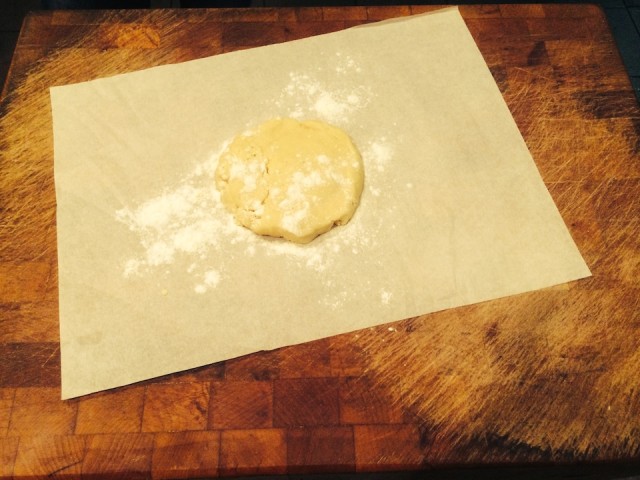
7. Generously sprinkle rice flour over the dough and parchment. Then, place the second piece of paper on top of the dough, centered over the first. The layered parchment will allow the more fragile dough to be rolled out flat, without tearing or crumbling.
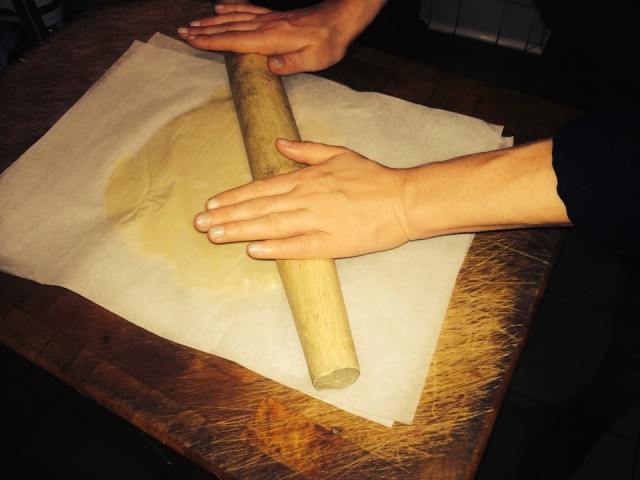
10. Roll the dough into an 11 in. circle. Use the dimensions of the paper (12 in. x 18 in.) to guide you, as you roll out the circle. When you approach about an inch from the shorter side of the parchment, you should have an evenly flat, approximately 11 in. circular piece.
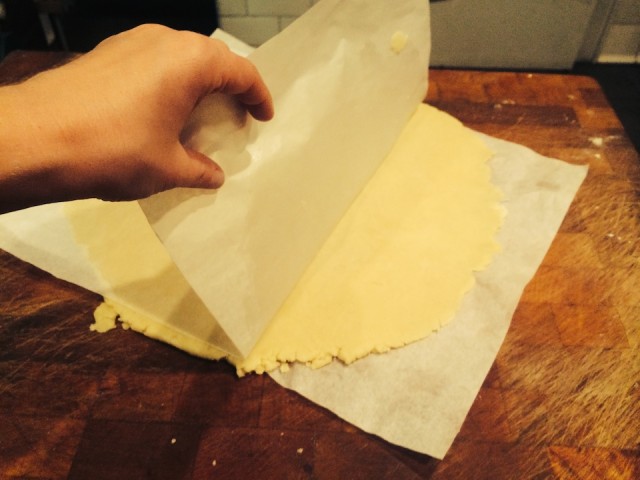
11. Remove the top piece of parchment gently, avoiding tearing the dough underneath, as much as possible. The more flour you add before rolling the dough, the easier this process will be. But, if the dough tears, simply push it back together with your fingertips.
12. Place a 9 in. pie or tart pan, face down over the center of the dough. Place one hand under the parchment and one hand on the bottom of the pie pan. Then, carefully but quickly turn the pan right-side-up, transferring the dough onto the pan.
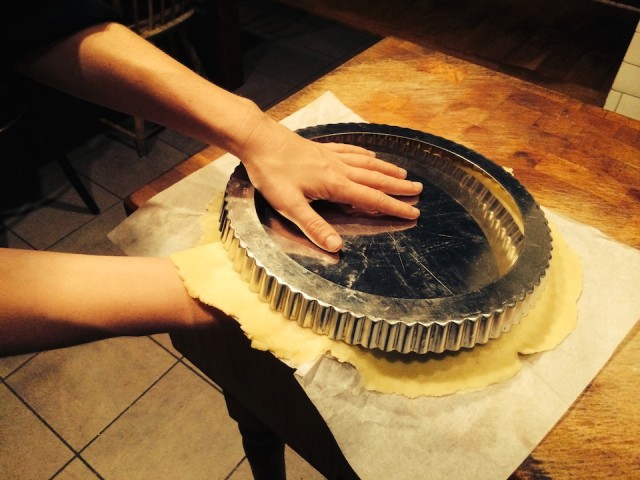
13. Gently remove the layer of parchment from the dough. As you remove the paper, the weight of the dough will cause it to slide into the pan. You may have to aid the process by gently pressing the dough into the pan. Again, fix any tears in the dough with your fingertips.
14. At this point, your crust is ready for a variety of pie preparations.
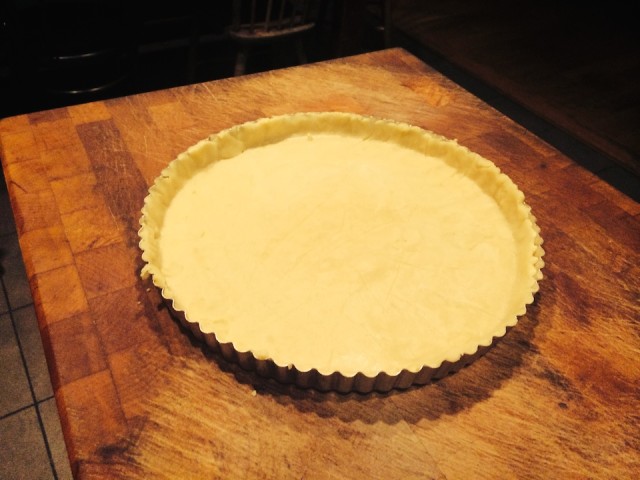
You can pre-bake, or “blind bake,” the crust if you want to use a custard or mouse filling by weighing down the dough to the pan, using a layer of parchment paper and dried beans and just following the baking time described by your filling’s recipe after that.
Since the recipe yields 2 crusts, you can also double layer the crust, following the same steps listed above. Or, as personal favorite preparation, you can use that extra dough to create latticework that covers your fruit fillings. Then, when the filling bubbles up during baking, it coats the top of the crust with a caramelized sugar glaze.
Let us know if you try it and how it turns out!
David is the resident nerd around these parts. Running a popular tech blog (TheUnlockr.com) for the past 6 years, he’s taken his over-analytical mind and made the transition to food.